![]() In my previous posts I showed you how to download YouTube videos and how to convert them to a better format. Wouldn't it be great to use the skills learned and create a small, cool desktop application that downloads YouTube videos (and later extend it to more video sites) and converts them to whatever format you want? I bet it would!
In my previous posts I showed you how to download YouTube videos and how to convert them to a better format. Wouldn't it be great to use the skills learned and create a small, cool desktop application that downloads YouTube videos (and later extend it to more video sites) and converts them to whatever format you want? I bet it would!
Let's get hands on it!
This will be a multi-part article on how to create this application. As the title of my blog "good coders code, great reuse" suggests, I will reuse as many software components as possible. I will use a free compiler, free gui framework and any free libraries I can find useful. Also I will try to take as many screenshots as possible to make this tutorial newbie friendly. For this reason I just installed a fresh copy of Windows XP on my VMware virtual machine (for those of you who don't know what virtual machine is, here is a quote from Intro to Virtualization: "Virtualization allows multiple virtual machines, with heterogeneous operating systems to run in isolation, side-by-side on the same physical machine.") which I will be developing the software from scratch on.
Since I am using the "good coders code, great reuse" principle, naturally I want parts of my code to be reusable. That's why I will first create a neat video downloading library in C which I will reuse later in the test command line application and the final GUI application which will probably be written in C++ using some cross-platform GUI framework/toolkit.
Part I: Preparation of the Tools
Since I am doing this project from scratch on a naked WinXP machine, the first thing I personally need need is a good browser. I will be searching for tools, libraries and will read documentation a lot, so I need a good browser. My choice - FireFox.
Next I will need a text editor to write the code in. My choice for this project - Vim. Since I want to create this project from scratch, I will need some essential plugins for vim, otherwise editing the source files would take me forever. From all the plugins I usually use in my vim configuration, for this project I'll use: a to quickly switch between .c and .h source files, bufexplorer to quickly navigate around buffers, bufpos to quickly switch between buffers, c-support to quickly write C/C++ code (it has key mapping cheat-sheet in the plugin's archive), surround to quickly change/add/insert quotes, parens etc, and taglist to navigate around source files. To use the last plugin (taglist) we also need Exuberant Ctags tool. Installation process of all these programs and plugins is straight forward.
I installed vim to "C:\program files\vim" and ctags to "C:\ctags56".
To compile the project we will also need a descent compiler. I will choose MinGW which is "a collection of freely available and freely distributable Windows specific header files and import libraries combined with GNU toolsets that allow one to produce native Windows programs that do not rely on any 3rd-party C runtime DLLs." Getting to run MinGW is not as easy as the previous tools so if you are not sure just download the automatic installer and it will do everything for you. The automatic installer can be downloaded from 'Current' package version release of MinGW at SourceForge.
I installed mingw using automated installer to "C:\mingw".
We still need a debugger. Going quickly through MinGW's files at SourceForge I couldn't find the GDB package. So I joined #mingw on FreeNode IRC network and in a few minutes someone helped me by suggesting that it was located in snapshot release. Thank you!
[17:15:49] * Now talking in #mingw
[17:16:07] <pkrumins> hi, what debugger could I use with mingw? I don't see gdb coming with any of the packages, did i miss it?
[17:20:30] <Vinky> pkrumins, snapshot->gdb
IRC is a powerful resource to get help at. Learn to use it.
Next we need a cross platform GUI toolkit. I am pretty familiar with wxWidgets and have used it in a few projects, so I will use for this project as well. I will not compile it at the moment because first I want to create a library and then the command line tool and only then the GUI app.
We are now ready to create the video downloading library. Before we do it, let's test if our development environment works.
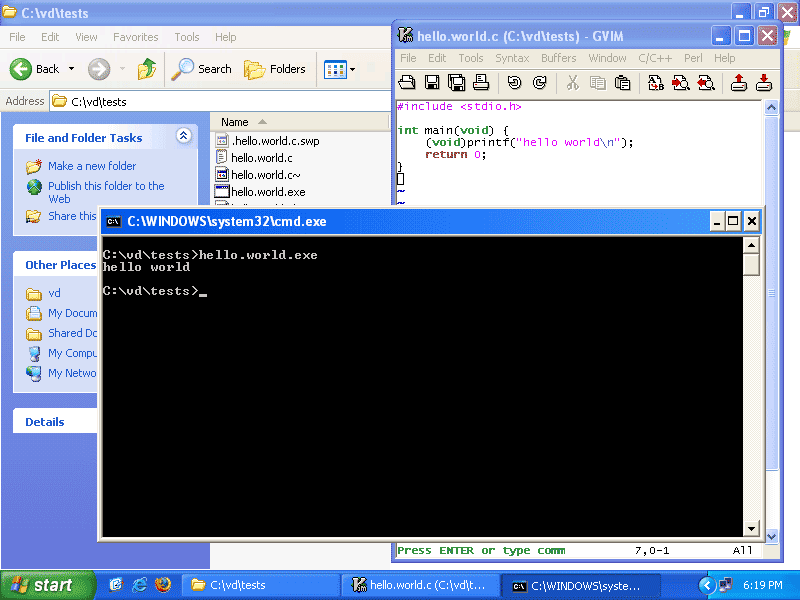
Let's write the hello world application, compile it and run it. Click, click...
#include <stdio.h>

int main(void) {
    (void)printf("hello world\n");
    return 0;
}
We are using vim with c-support plugin, so compiling the hello world from vim is done (by looking up in the c-support plugin's keyboard mapping cheat sheet) by typing \rc and the program can be run by typing \rr. Quick and neato.
This is end of part one. In part two I will create the library and the command line test program. Until next time!